Automate your repetitive tasks – Introducing Recipes

As recruiters, we spend a large chunk of our time on repetitive activities instead of building relationships with our candidates. Recipes are a way to claim your day back from mundane activities!
With Recipes, we introduce automation to Recruiting. Recipes are a simple way to instruct Recruiterflow to take certain actions based on certain triggers that happen inside the system. For example, want to send an automated disqualification email to all the candidates who were disqualified straight from the application review or Applied stage? Just create a recipe!
This feature has been in Beta for a few weeks now and we are now releasing it to all of our users. Here are some ways you can use this new feature to save your hours every day!
Use case 1:
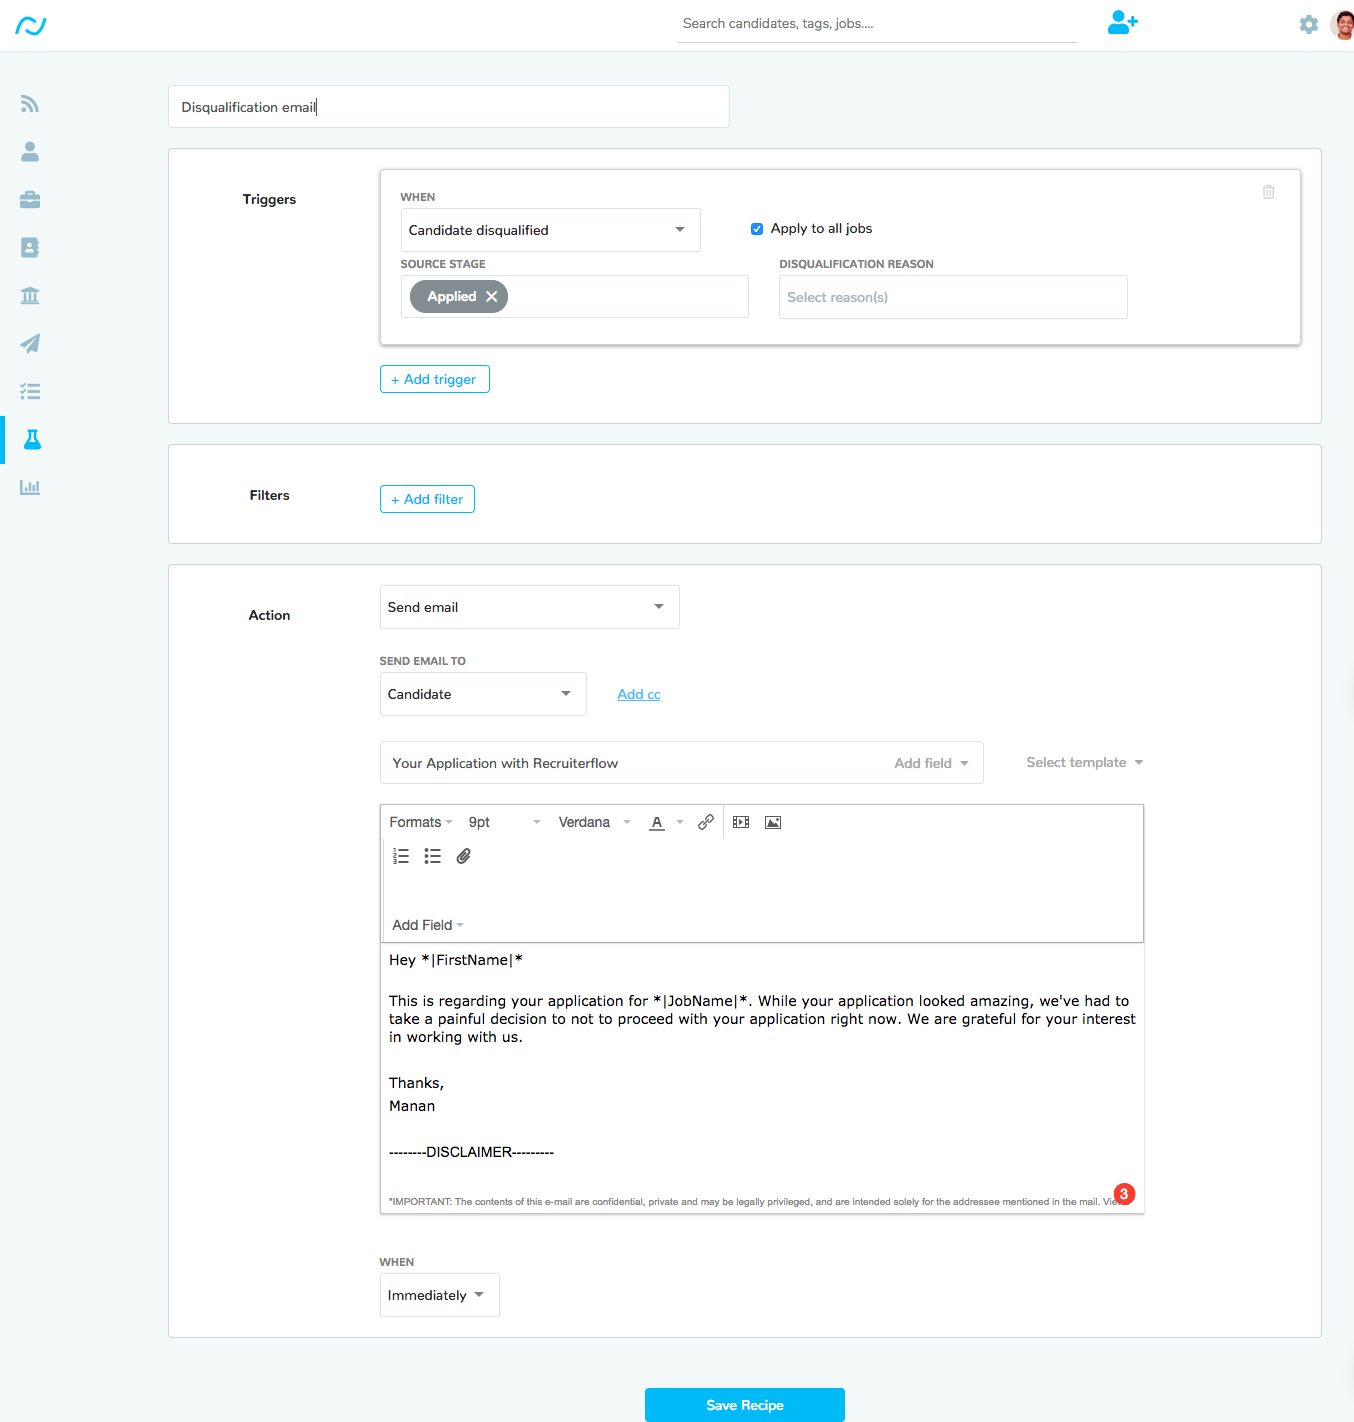
Send a disqualification email to all the candidates who are disqualified straight from the Applied/Application review stage after they’ve been disqualified.
Use case 2:
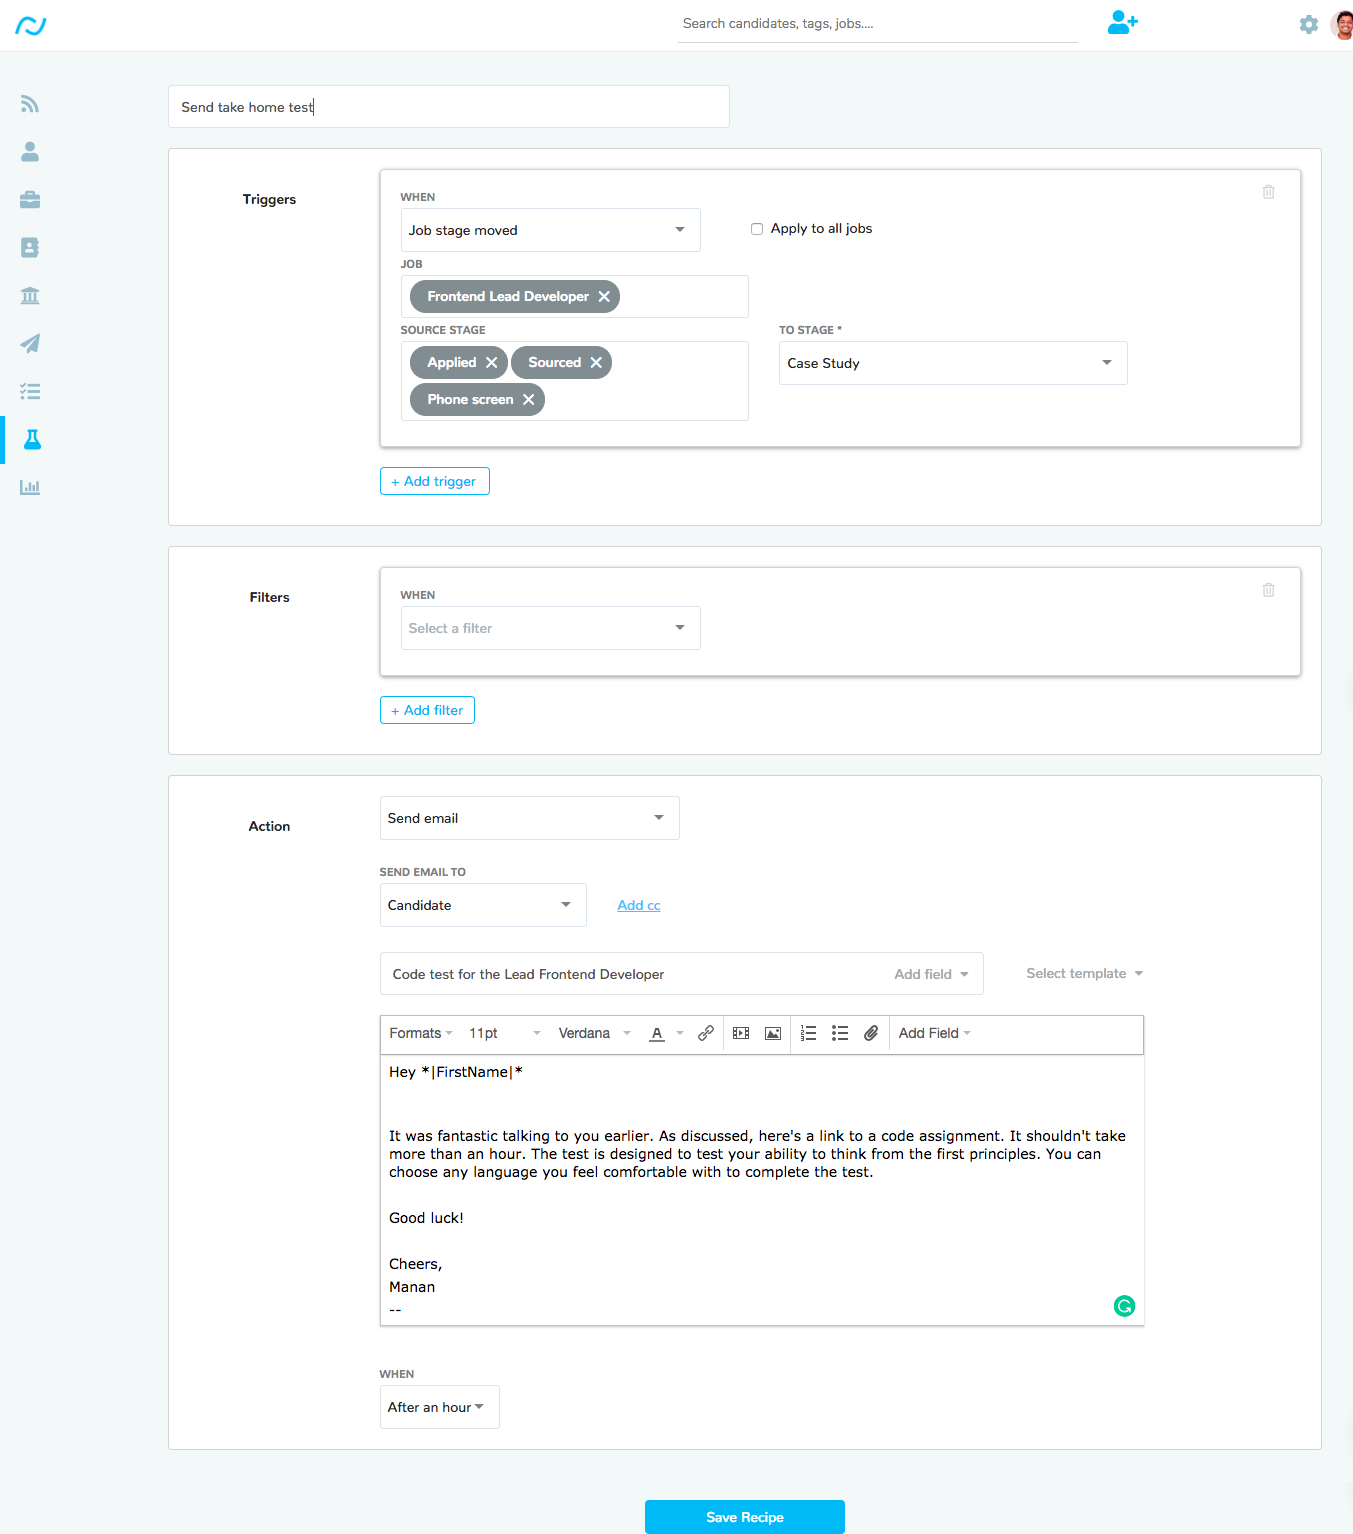
Send a take-home assignment to all the candidates who are moved to the take-home test.
Use case 3:
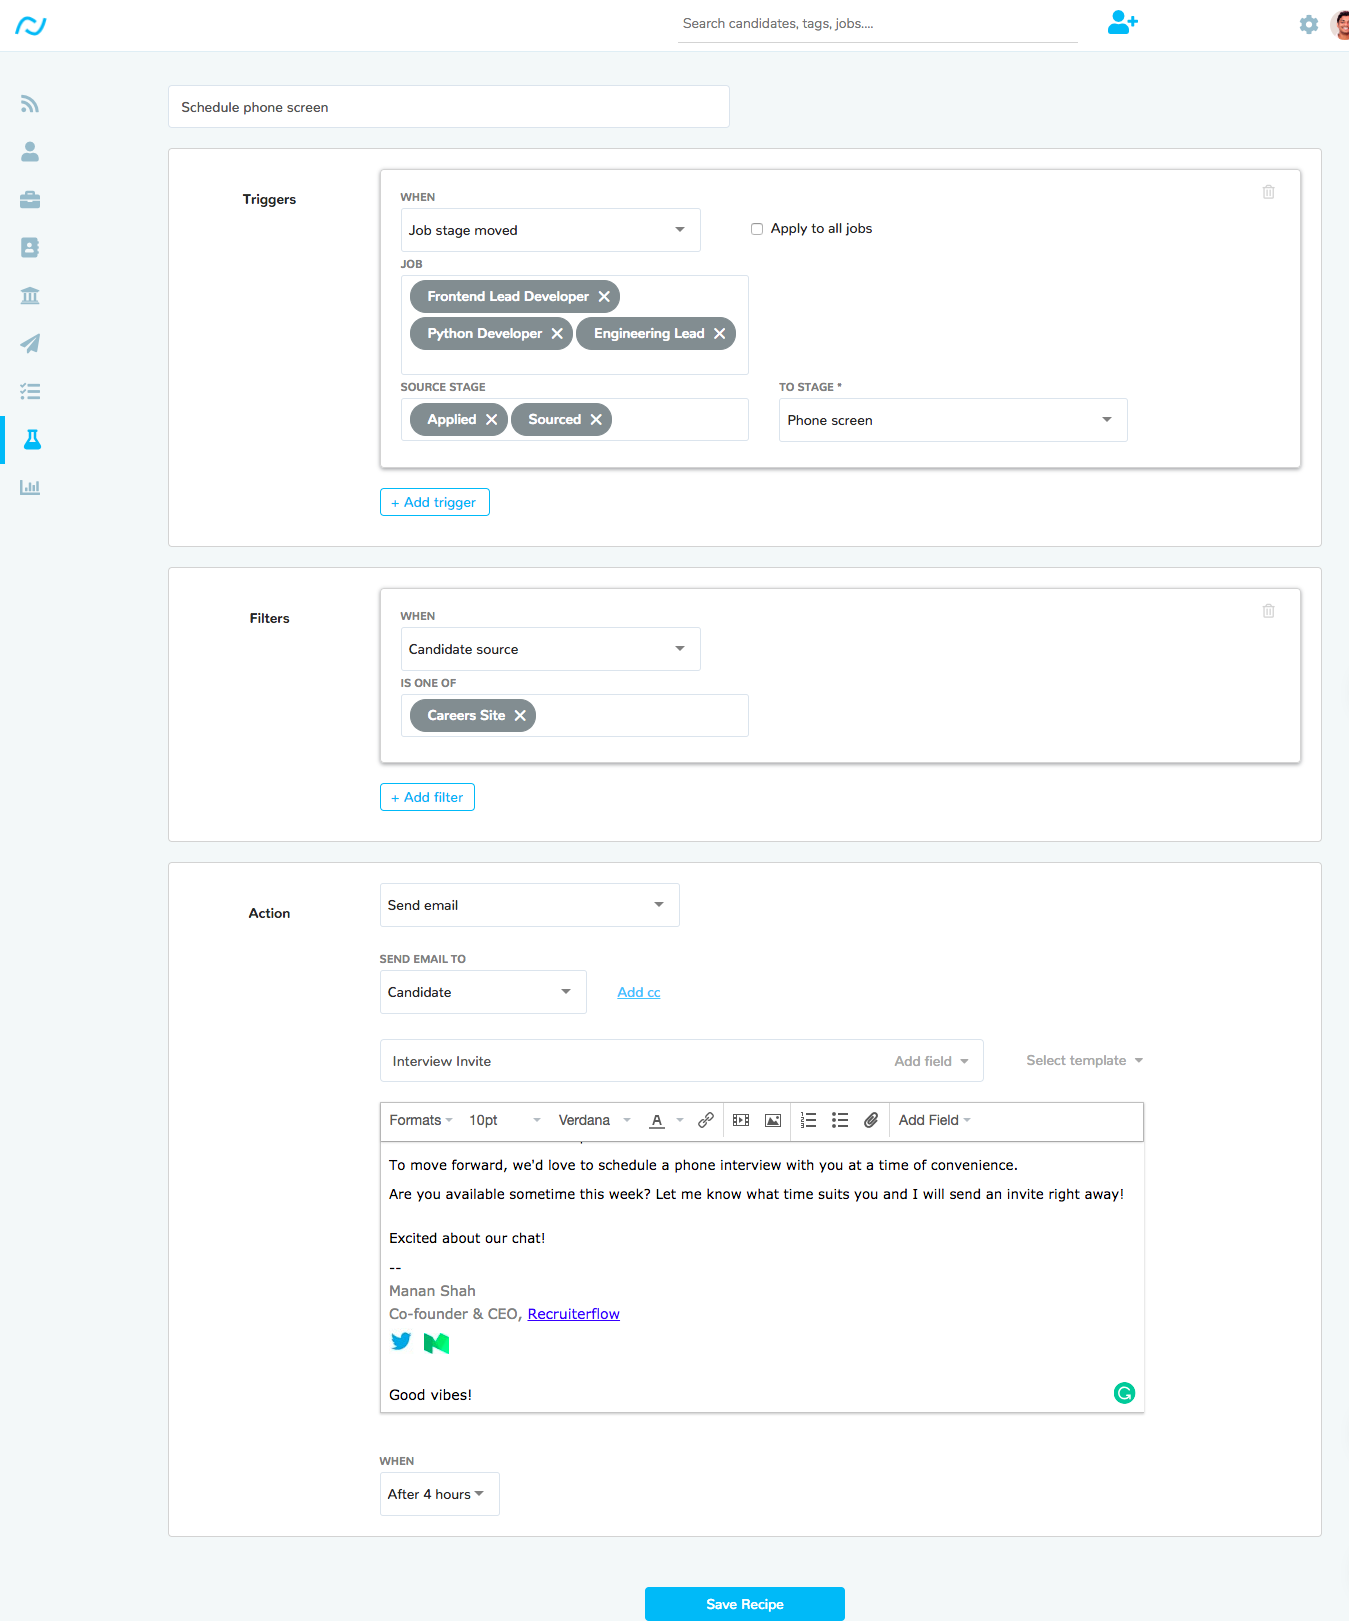
Send a scheduling email to the candidate who’s been moved to the phone interview stage.
Use case 4:
Notify specific people whenever a candidate is moved to the offer stage by the hiring manager or any other member of the team.
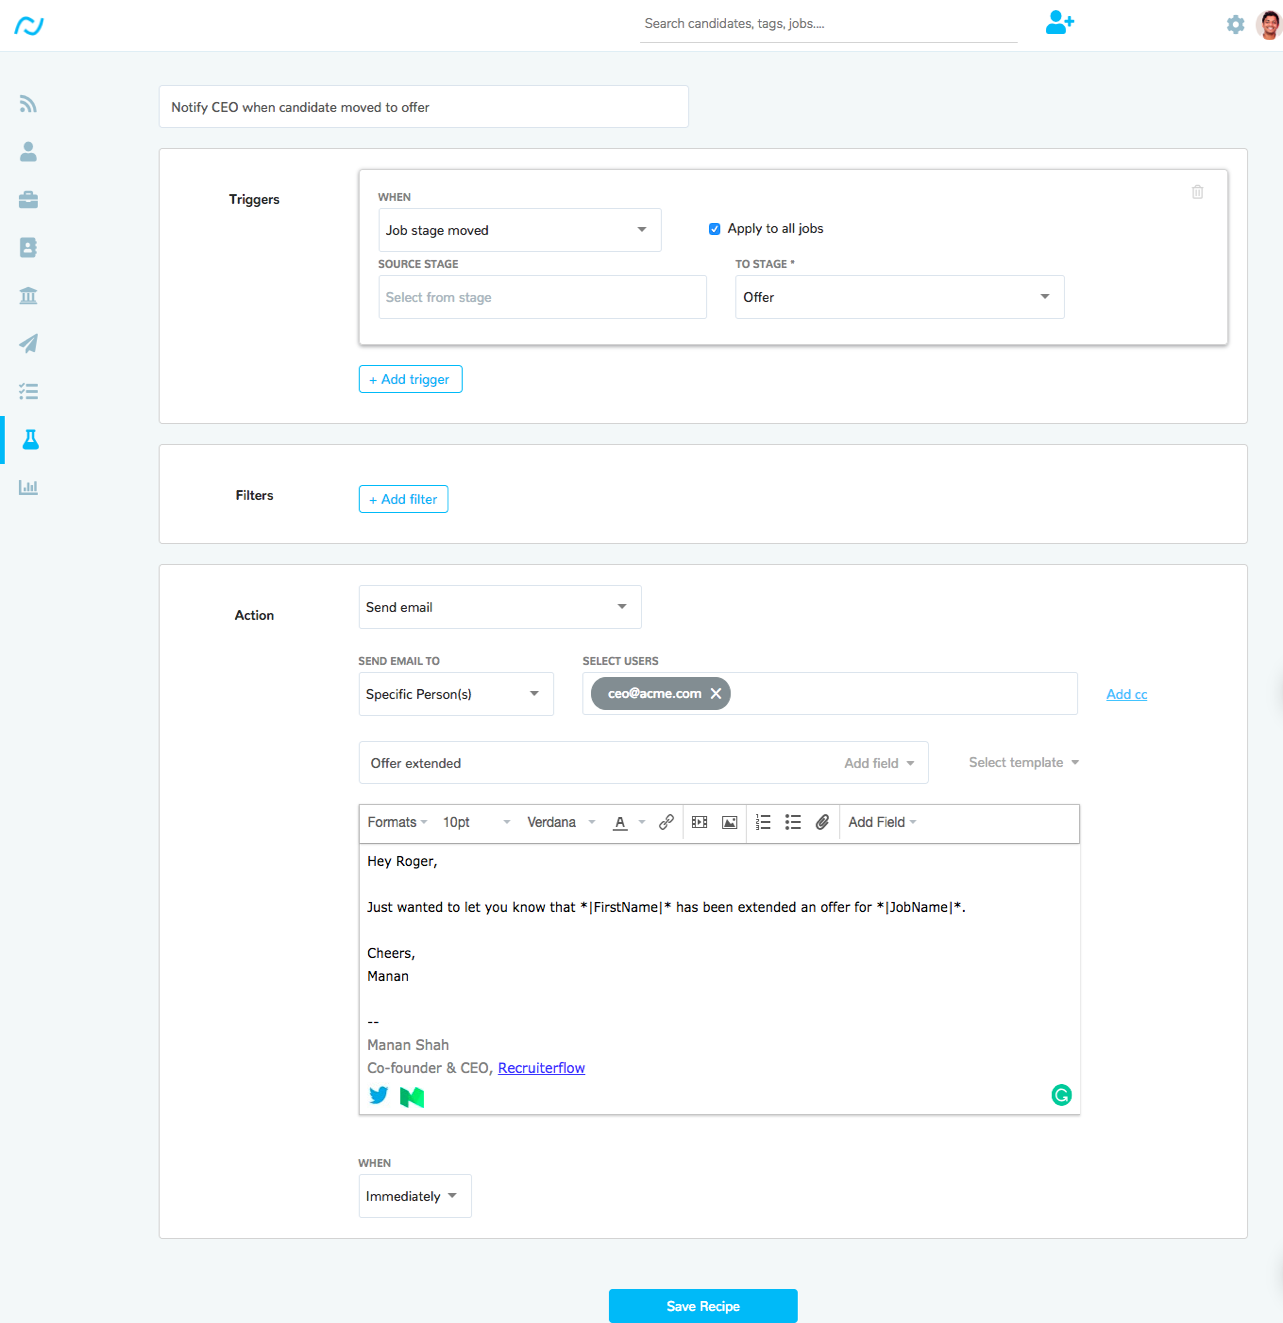
How to create recipes?
Step 1: Open the recipes page
Head on over to the recipes page in Recruiterflow using the main navigation panel.
Step 2: Create triggers
Triggers are a set of conditions that will initiate the action. There are 4 types of triggers that you can set in Recruiterflow. You can define multiple triggers in one recipe. The action will be taken even if only one of the condition triggers is satisfied. If there is a candidate satisfies all the triggers in a recipe, the action will be taken just once!
- Candidate applies
- Candidate is sourced
- Candidate is disqualified
- Candidate’s moved from one stage to another
Step 3: Apply filters
A filter makes sure that the recipe runs only on a certain category of candidates. In the first version, we have just one filter – candidate source. If the candidate’s source is set as a certain source, the recipe will run only then. Leaving this field empty means that the recipe will run on all candidates.
Step 4: Choose what’s the action you want Recruiterflow to take
There are two types of actions you can ask Recruiterflow to take.
- Move candidate stage
- Send an email to a specific set of people
After this, you can either compose the emails or just select a template to send the email. You can also choose the delay the emails for a specific time after the trigger has occurred.
Go ahead! Create recipes and wrestle the control of your day back from mundane activities!
Product Updates
Manan Shah